Table of Contents:
In this tutorial, you'll learn how to self-host your Next.js app or any other service on a VPS. No need for Vercel, Google Cloud, AWS, or even Coolify or Dokploy. The goal of this setup is to keep it working for the next 10+ years with minimal maintenance, low cost, high security standards, and great performance. You only pay for the server. Setting everything up for the first time may seem challenging, but the exciting part is that reusing it for future projects will be much easier. Thankfully, you have all the steps right here in one place!
My guiding principle here is to have the least possible difference between development and production configuration. We will reuse exactly the same Dockerfiles, Nginx config, and run Docker Swarm on both environments. Only docker-compose.yml will be different for development and production.
What we're building: A Next.js blog that stores data in Postgres. This simple example shows the basics. Later, you can add more services like Redis, Fastify or handle multiple websites. You can use the same method to self-host Umami analytics, Metabase, Formbricks etc.
Why Docker Swarm? It manages containers for you. Much easier to set up than Kubernetes or Nomad. It's actively developed by Mirantis.
Why GitLab? It has a more generous free tier than GitHub, especially regarding container registry quota. I also found GitLab pipelines more capable than GitHub Actions. Plus, GitLab is open source, so I can always self-host it. You can even speed up the build process by self-hosting just the runner and keeping everything else on the cloud. It's very flexible.
Why Nginx? Battle-tested, ultra-fast, with granular control. Caddy is a decent alternative, and many people appreciate the ease of issuing certificates. However, when it comes to wildcard certificates, as in this tutorial, it's not that straightforward anymore.
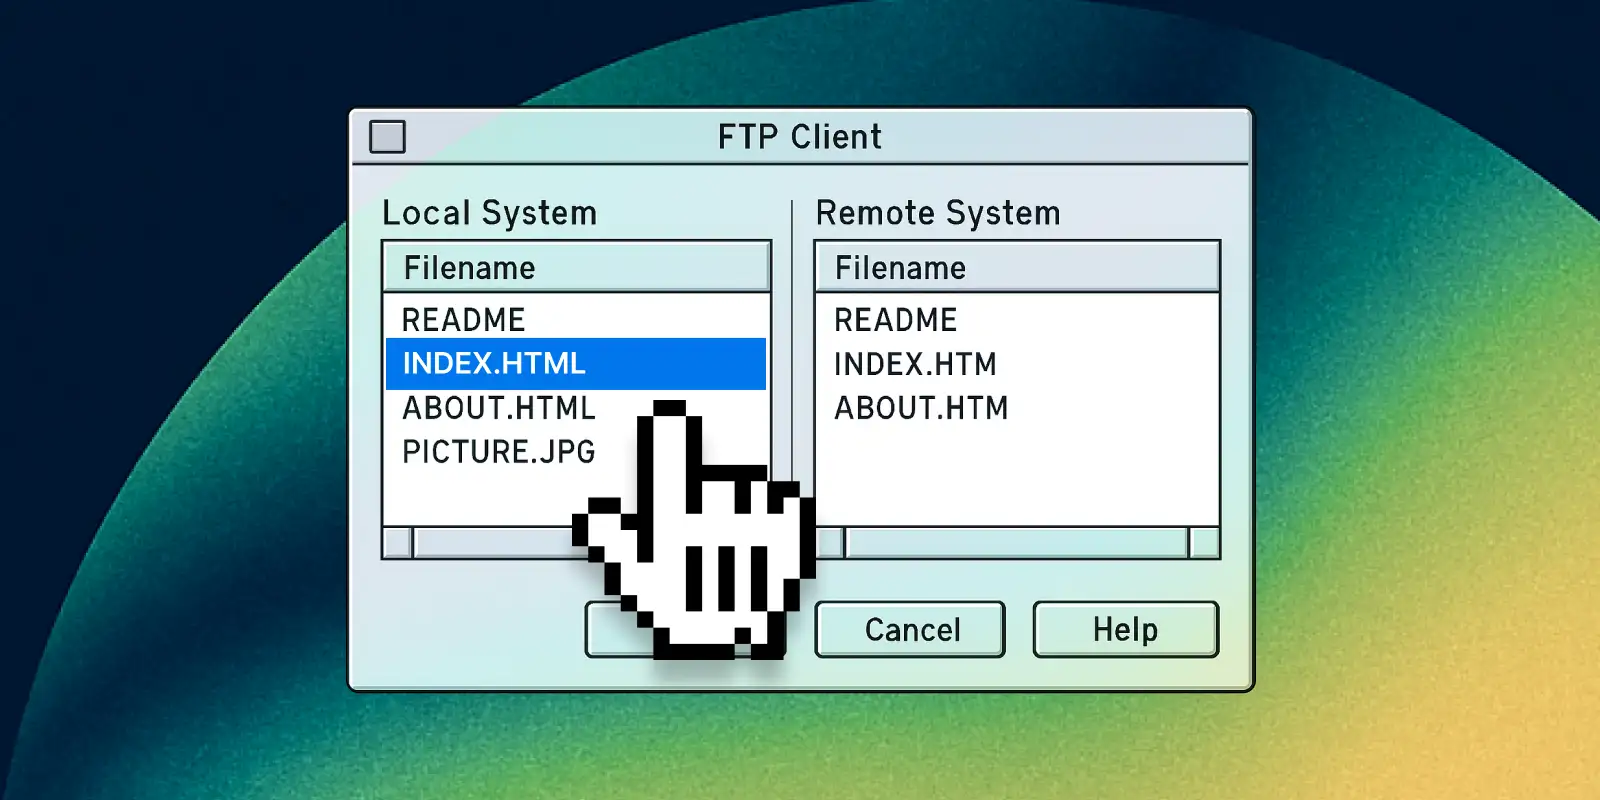
Folder structure
See complete source code↗ covered in this tutorial.
app/
├── src/
│   ├── app/blog/page.tsx
│   └── app/api/posts/route.ts
├── lib/
│   └── postgres.ts
├── next.config.ts
├── .env
├── .gitlab-ci.yml
└── Dockerfile

proxy/
├── conf/nginx.conf
├── .gitlab-ci.yml
└── Dockerfile

swarm/
├── .gitlab-ci.yml
├── docker-compose.yml
└── docker-compose.prod.yml
1. Development Setup
First, install these tools:
- OrbStack↗ or Docker Desktop
- VSCode/Cursor Docker extension↗
1.1 Next.js
Create a new Next.js app:
npx create-next-app@latest
See Next.js Docs↗ for more info.
next.config.js
module.exports = { output: 'standalone' }
Dockerfile
FROM node:22-alpine AS base
# 1. Install dependencies only when needed
FROM base AS deps
RUN apk add --no-cache libc6-compat
WORKDIR /app
COPY package.json yarn.lock* package-lock.json* pnpm-lock.yaml* .npmrc* ./
RUN npm ci
# 2. Rebuild the source code only when needed
FROM base AS builder
WORKDIR /app
# Use CI env variable to determine if running on GitLab CI
ARG CI=false
ENV CI=${CI}
COPY /app/node_modules ./node_modules
COPY . .
ENV NEXT_TELEMETRY_DISABLED=1
RUN \
npm run build
# 3. Production image, copy all the files and run next
FROM base AS runner
WORKDIR /app
ENV NODE_ENV=production
ENV NEXT_TELEMETRY_DISABLED=1
RUN addgroup --system --gid 1001 nodejs
RUN adduser --system --uid 1001 nextjs
COPY /app/public ./public
# Automatically leverage output traces to reduce image size
# https://nextjs.org/docs/advanced-features/output-file-tracing
COPY /app/.next/standalone ./
COPY /app/.next/static ./.next/static
USER nextjs
CMD ["node", "server.js"]
To test if the image builds without errors, run docker build . in the folder where the Dockerfile is located.
1.2 Nginx
http {
    include             /etc/nginx/mime.types;
    default_type        application/octet-stream;
    server_tokens       off;
    sendfile            on;
    keepalive_timeout   65;

    ssl_certificate /etc/letsencrypt/live/example/fullchain.pem;
    ssl_certificate_key /etc/letsencrypt/live/example/privkey.pem;

    # Support only TLSv1.2 and TLSv1.3
    ssl_session_timeout 1d;
    ssl_session_cache shared:SSL:10m;
    ssl_session_tickets off;
    ssl_buffer_size 8k;
    ssl_protocols TLSv1.2 TLSv1.3;
    ssl_prefer_server_ciphers off;
    ssl_ciphers ECDHE-ECDSA-AES128-GCM-SHA256:ECDHE-RSA-AES128-GCM-SHA256:ECDHE-ECDSA-AES256-GCM-SHA384:ECDHE-RSA-AES256-GCM-SHA384:ECDHE-ECDSA-CHACHA20-POLY1305:ECDHE-RSA-CHACHA20-POLY1305:DHE-RSA-AES128-GCM-SHA256:DHE-RSA-AES256-GCM-SHA384:DHE-RSA-CHACHA20-POLY1305;
    ssl_ecdh_curve secp384r1;
    ssl_stapling on;
    ssl_stapling_verify on;

    # Human-readable logs format
    log_format main '[$host] $remote_addr $remote_user "$request" '
                'status: "$status" request_time: "$request_time" referer: "$http_referer" '
                'connection_requests: "$connection_requests" pipe: "$pipe" '
                'bytes: "$body_bytes_sent" request_length: "$request_length" '
                'agent: "$http_user_agent"';

    access_log  /var/log/nginx/access.log  main;

    server {
        listen 80;
        listen [::]:80;
        server_name localhost example.local *.example.local example.com *.example.com;

        location / {
            # Redirect from http to https and www.
            if ($host ~* ^(example)) {
                    return 301 https://www.$host$request_uri;
            }
            return 301 https://$host$request_uri;
        }
    }

    server {
        listen 443 ssl;
        listen [::]:443 ssl;
        http2 on;
        server_name www.example.local example.local www.example.com example.com;

        gzip on;
        gzip_proxied any;
        gzip_comp_level 4;
        gzip_types text/plain text/css application/json application/javascript text/xml application/xml application/xml+rss text/javascript;

        location / {
                if ($host ~* ^(example)) {
                        rewrite ^ https://www.$host$request_uri? permanent;
                }
                try_files $uri @nextjs;
        }

        location @nextjs {
                resolver 127.0.0.11;
                proxy_set_header X-Forwarded-For $proxy_add_x_forwarded_for;
                proxy_set_header X-Real-IP $remote_addr;
                proxy_set_header Host $host;
                proxy_http_version 1.1;

                # Handle websockets
                proxy_set_header Upgrade $http_upgrade;
                proxy_set_header Connection "upgrade";

                # Use variable for upstream address to prevent nginx
                # from crashing if upstream hasn't started yet
                set $upstream_nextjs app:3000;
                proxy_pass http://$upstream_nextjs;
                add_header X-Frame-Options "SAMEORIGIN" always;
                add_header X-XSS-Protection "1; mode=block" always;
                add_header X-Content-Type-Options "nosniff" always;
                add_header Referrer-Policy "no-referrer-when-downgrade" always;
                add_header Content-Security-Policy "default-src * data: 'unsafe-eval' 'unsafe-inline'" always;
        }
    }
}
Dockerfile
FROM nginx:mainline-alpine
RUN rm /etc/nginx/conf.d/default.conf
COPY conf/nginx.conf /etc/nginx/
Local Domain and Server Certificates
You need a local domain and server certificates for testing. Create them with this one-line command:
openssl req -x509 -newkey rsa:4096 -keyout privkey.pem -out fullchain.pem -sha256 -days 365 -nodes -subj "/CN=example.local" -addext "subjectAltName=DNS:example.local,DNS:*.example.local"
See more about OpenSSL for local development.
Next, add these lines to /etc/hosts:
...
+127.0.0.1 example.local
+127.0.0.1 www.example.local
Easier option: Use LocalCan instead. It creates server certificates automatically and makes your .local domain work on all devices in your local network, with no browser security warnings.

1.3 Docker Compose for Development
services:
  proxy:
    build: ../proxy
    image: proxy:latest
    ports:
      - "443:443"
      - "80:80"
    volumes:
      - ../proxy/conf/nginx.conf:/etc/nginx/nginx.conf
      - ../proxy/certs:/etc/letsencrypt/live/example

  app:
    build:
      context: ../app
      target: deps
    image: app:latest
    env_file:
      - ../app/.env
    volumes:
      - "../app:/app"
      - /app/node_modules/
      - /app/.next
    command: npm run dev  # for dev, overwrite cmd from Dockerfile (`node server.js`)

  db:
    image: postgres:18-alpine
    restart: always
    ports:
      - "5432:5432"
    env_file:
      - ../app/.env
    volumes:
      - pgdata:/var/lib/postgresql/data

volumes:
  pgdata:
We added Postgres as a third service. We'll connect to it from Next.js later. For now, create a .env file in the app folder with a password:
NODE_ENV=development
POSTGRES_PASSWORD=11111111111111111111111111111111
Before starting, initialize Docker Swarm. You only need to do this once:
docker swarm init
Now start your stack:
docker stack deploy -c docker-compose.yml example-stack
Check your running services with docker service ls. Some might show 0/1:
ID             NAME                  MODE         REPLICAS   IMAGE                PORTS
tlh8ke9u7qtl   example-stack_app     replicated   0/1        app:latest
89s4lxw5uphw   example-stack_db      replicated   1/1        postgres:18-alpine   *:5432->5432/tcp
xk71j3zesb4j   example-stack_proxy   replicated   0/1        proxy:latest         *:80->80/tcp, *:443->443/tcp
Do debug that we can use docker service ps command to list current services. Run docker service ps example-stack_app and you will see No such image: app:latest in the error column. What happened is: Postgres is running because it's an official image from Docker Hub, but app:latest image is not availabe - we need to build it first, same for proxy:latest. Run these commands:
docker-compose build --no-cache app
docker-compose build --no-cache proxy
Deploy the stack again to update it:
docker stack deploy -c docker-compose.yml example-stack
Visit https://www.example.local/ and dismiss the security warning. Your Next.js app is now running with hot reload!
Handy commands:
# Start the stack (or update if already running)
docker stack deploy -c docker-compose.yml example-stack

# Stop the stack
docker stack rm  example-stack

# Build images
docker-compose build --no-cache app
docker-compose build --no-cache proxy
1.4 Connect from Next.js to Postgres
There are multiple ways to go about connecting to your database. If you plan to use an external database (like Supabase), that's easy; just follow your provider's documentation. But since we self-host Postgres, which is not even exposed to the public internet, we will need to create an API route for fetching the data. Then, the Page component will use this API endpoint instead of connecting to Postgres directly. This extra step will be needed when building a Docker image on GitLab to give it access to the data from the production DB and build the image with all posts.
Install the pg package:
npm i pg
Create a file that connects to Postgres:
import pkg from 'pg'
import fs from 'fs'

const password = process.env.POSTGRES_PASSWORD

export const pool = new pkg.Pool({
  user: 'postgres',
  host: 'db',
  database: 'postgres',
  password,
  port: 5432,
})
Create a simple table with test data. Use a database client like TablePlus or DBeaver to connect to your local Postgres and run this query. Use localhost as the host (not db) because you're connecting from outside Docker:
create table posts (id serial primary key,title text not null,content text not null);
insert into posts (title, content) values ('Hello, world!', 'This is a test post');
Create an API route to fetch all posts. Keep in mind that it's a public route. You can add an API key validation if you want to keep this route private.
import { pool } from '../../../../lib/postgres'

export async function GET() {
  const posts = await pool.query('SELECT * FROM posts')
  return new Response(JSON.stringify(posts.rows), {
    status: 200,
    headers: { 'Content-Type': 'application/json' },
  })
}
Create a page that shows all posts at /blog:
interface Post {
  id: string
  title: string
  content: string
}

export default async function Page() {
  const host = 'http://app:3000'
  let posts: Post[] = []
  try {
    const data = await fetch(`${host}/api/posts`, { next: { revalidate: 30 } })
    posts = await data.json()
  } catch (error) {
    // Allow to fail gracefully
    console.error(error)
  }
  return (
    <ul>
      {posts.map((post) => (
        <li key={post.id}>
          {post.title}
          <br />
          {post.content}
        </li>
      ))}
    </ul>
  )
}
Go to https://www.example.local/blog and you should see our "Hello, world!" post.
2. Production Setup
2.1 GitLab - Create Repositories and Build Images
Now we'll set up a pipeline that builds Docker images. It saves three copies:
app:latest(latest version)app:8fa4bb48(tagged with commit ID)app:buildcache(speeds up future builds)
Create .gitlab-ci.yml files in both App and Proxy folders. They use the same pipeline:
image: docker:latest
services:
    - docker:dind
variables:
    DOCKER_HOST: tcp://docker:2375
    DOCKER_TLS_CERTDIR: ''
build:
  before_script:
    - docker login -u gitlab-ci-token -p $CI_JOB_TOKEN $CI_REGISTRY
    - docker buildx create --driver docker-container --name builder
    - docker buildx use builder
  script:
    - docker buildx build
      --build-arg CI=true
      --cache-from type=registry,ref=$CI_REGISTRY_IMAGE:buildcache
      --cache-to type=registry,ref=$CI_REGISTRY_IMAGE:buildcache,mode=max
      --tag $CI_REGISTRY_IMAGE:$CI_COMMIT_SHORT_SHA
      --tag $CI_REGISTRY_IMAGE:latest
      --push
      .
We need one more change. When GitLab builds the image, it needs to use the public URL for the API. We added a CI environment variable to check this. Edit src/app/blog/page.tsx:
const host = process.env.CI ? 'https://www.example.com' : 'http://app:3000'
Create two repositories on GitLab (click "Create blank project"): one for App, one for Proxy. Push your code (uncheck "Initialize repository with a README"). GitLab will automatically build the images using pieplines we've just created.
See Docker layer caching docs↗ for more info.
2.2 Docker Compose for Production
The production configuration is different. We'll use actual Docker images from GitLab instead of local folders, and store the POSTGRES_PASSWORD securely with Docker secrets.
services:
  proxy:
    image: registry.gitlab.com/<your-repo>/proxy:latest
    ports:
      - "443:443"
      - "80:80"

  app:
    image: registry.gitlab.com/<your-repo>/app:latest

  db:
    image: postgres:18-alpine
    ports:
      - "5432:5432"
    secrets:
      - postgres_password
    environment:
      - POSTGRES_PASSWORD_FILE=/run/secrets/postgres_password
    volumes:
      - pgdata:/var/lib/postgresql/data

secrets:
  postgres_password:
    external: true

volumes:
  pgdata:
To get image paths from GitLab: go to Deploy → Container Registry, click the image name, then click "Copy" next to the latest tag.
Create a Docker secret for the Postgres password:
sudo echo "11111111111111111111111111111111" | sudo docker secret create postgres_password -
To keep your password secure, clear your shell history: > ~/.bash_history or unset HISTFILE, then clear the current session: history -c
2.3 Certificate Renewal
First, make sure to create an A DNS record pointing the example.com host to the IP address of your VPS. Do the same for *.example.com to allow www and any other subdomains.
We'll use Let's Encrypt for server certificates. We want a wildcard certificate (*.example.com) so any subdomain works.
Wildcard certificates need a DNS-01 challenge↗, which edits DNS records. (The simpler HTTP-01 challenge↗ doesn't support wildcards.) Your domain provider needs a DNS API - most have one (DigitalOcean, Hetzner, Cloudflare, etc.).
Certbot handles this automatically. It just needs your API key. Certbot and Nginx share a volume to store the certificate. Each provider has its own Certbot image. I use DigitalOcean, so I'll use certbot/dns-digitalocean.
We'll set up two loops:
- Certbot checks for renewal every 12 hours
- Nginx reloads its config every 6 hours (with zero downtime)
Add the certbot service to docker-compose.prod.yml. Replace the domain and email with yours:
services:
  proxy:
    image: registry.gitlab.com/<your-repo>/proxy:latest
+   command: '/bin/sh -c ''while :; do sleep 6h & wait $${!}; nginx -s reload; done & nginx -g "daemon off;" '''
    ports:
      - "443:443"
      - "80:80"
    volumes:
      - certbot-etc:/etc/letsencrypt
      - certbot-var:/var/lib/letsencrypt

  app:
    image: registry.gitlab.com/<your-repo>/app:latest
    secrets:
      - postgres_password

  db:
    image: postgres:18-alpine
    ports:
      - "5432:5432"
    secrets:
      - postgres_password
    environment:
      - POSTGRES_PASSWORD_FILE=/run/secrets/postgres_password
    volumes:
      - pgdata:/var/lib/postgresql/data

+ certbot:
+   image: certbot/dns-digitalocean
+   volumes:
+     - certbot-etc:/etc/letsencrypt
+     - certbot-var:/var/lib/letsencrypt
+   entrypoint:
+     - /bin/sh
+     - -c
+     - |
+       trap exit TERM
+       while :; do
+         certbot certonly \
+           --dns-digitalocean \
+           --dns-digitalocean-credentials /opt/certbot/digitalocean.ini \
+           --dns-digitalocean-propagation-seconds 60 \
+           --email <your-email> \
+           --non-interactive \
+           --agree-tos \
+           --no-eff-email \
+           --renew-with-new-domains \
+           --keep-until-expiring \
+           -d example.com,*.example.com \
+           --cert-name example
+         sleep 12h & wait $${!}
+       done
+   secrets:
+     - source: certbot_do_token
+       target: /opt/certbot/digitalocean.ini

secrets:
  postgres_password:
    external: true
+ certbot_do_token:
+   external: true

volumes:
  pgdata:
+ certbot-etc:
+ certbot-var:
Finally, add the certbot_do_token docker secret:
sudo echo "dns_digitalocean_token = 123456abcdef" | sudo docker secret create certbot_do_token -
To leave no traces of entered secret, clear shell history: > ~/.bash_history or unset HISTFILE and clear curren session: history -c
2.4 Setup Ubuntu
Create a Droplet on DigitalOcean
- Create Ubuntu 24.04 LTS droplet in the DigitalOcean dashboard
- Choose SSH authentication (upload your public key)
- Enable monitoring and backups
Connect via SSH
On your local machine, connect to your server:
ssh root@SERVER_IP
Update the System
On your server as root, update everything:
apt update && apt upgrade -y
apt dist-upgrade -y
apt autoremove -y
apt autoclean
Set the Timezone
On your server as root:
timedatectl set-timezone UTC
Create a Deployer User
Create a non-root user for deployments. On your server as root:
adduser --gecos "" deployer
usermod -aG sudo deployer
Let the deployer user run sudo commands without a password (run as root):
visudo
Add this line at the end and save:
...
deployer ALL=(ALL) NOPASSWD:ALL
Set up SSH keys for the deployer user by allowing login using the same key as root (run as root):
mkdir -p /home/deployer/.ssh
cp /root/.ssh/authorized_keys /home/deployer/.ssh/
chown -R deployer:deployer /home/deployer/.ssh
chmod 700 /home/deployer/.ssh
chmod 600 /home/deployer/.ssh/authorized_keys
Configure SSH
First, backup your SSH config (run as root):
cp /etc/ssh/sshd_config /etc/ssh/sshd_config.backup
Create a secure SSH config (run as root):
cat > /etc/ssh/sshd_config.d/99-hardening.conf << 'EOF'
# Basic Settings
Port 22
Protocol 2
HostKey /etc/ssh/ssh_host_ed25519_key
HostKey /etc/ssh/ssh_host_rsa_key

# Authentication
PermitRootLogin no
PubkeyAuthentication yes
PasswordAuthentication no
PermitEmptyPasswords no
ChallengeResponseAuthentication no
AuthenticationMethods publickey
MaxAuthTries 3
MaxSessions 10

# Security
StrictModes yes
IgnoreRhosts yes
HostbasedAuthentication no
X11Forwarding no
AllowUsers deployer
ClientAliveInterval 300
ClientAliveCountMax 2
LoginGraceTime 30

# Logging
SyslogFacility AUTH
LogLevel VERBOSE

# Ciphers and Algorithms
Ciphers chacha20-poly1305@openssh.com,aes256-gcm@openssh.com,aes128-gcm@openssh.com,aes256-ctr,aes192-ctr,aes128-ctr
MACs hmac-sha2-512-etm@openssh.com,hmac-sha2-256-etm@openssh.com,hmac-sha2-512,hmac-sha2-256
KexAlgorithms curve25519-sha256,curve25519-sha256@libssh.org,diffie-hellman-group-exchange-sha256
EOF
Test and restart SSH (run as root):
sshd -t
systemctl restart ssh
Configure Firewall
You can either use ufw, which is Uncomplicated Firewall for Linux, or use DigitalOcean Firewall, a more convenient option. Here are the configs for both. Note that if you don't plan to connect multiple swarm nodes, you only need to expose ports 22, 80, and 443.
Set up UFW firewall rules:
ufw --force reset
ufw default deny incoming
ufw default allow outgoing
ufw allow 22/tcp comment 'SSH'
ufw allow 80/tcp comment 'HTTP'
ufw allow 443/tcp comment 'HTTPS'
ufw allow 2377/tcp comment 'Docker Swarm management'
ufw allow 7946/tcp comment 'Docker Swarm nodes'
ufw allow 7946/udp comment 'Docker Swarm nodes'
ufw allow 4789/udp comment 'Docker Swarm overlay'
ufw --force enable
ufw status verbose
DigitalOcean Firewall
In the DigitalOcean dashboard:
- Create a new firewall
- Inbound Rules:
- SSH (22/TCP) from your IP only
- HTTP (80/TCP) from everywhere
- HTTPS (443/TCP) from everywhere
- Custom (2377/TCP) from droplet's private IP (Docker Swarm)
- Custom (7946/TCP+UDP) from droplet's private IP (Docker Swarm)
- Custom (4789/UDP) from droplet's private IP (Docker Swarm)
- Outbound Rules:
- Allow all traffic
- Apply to your droplet
Disable Unnecessary Services
On your server (run as root):
systemctl disable bluetooth.service 2>/dev/null || true
systemctl disable cups.service 2>/dev/null || true
systemctl disable avahi-daemon.service 2>/dev/null || true
Install Docker
On your server as root:
# Add Docker's official GPG key:
sudo apt-get update
sudo apt-get install ca-certificates curl
sudo install -m 0755 -d /etc/apt/keyrings
sudo curl -fsSL https://download.docker.com/linux/ubuntu/gpg -o /etc/apt/keyrings/docker.asc
sudo chmod a+r /etc/apt/keyrings/docker.asc

# Add the repository to Apt sources:
echo \
  "deb [arch=$(dpkg --print-architecture) signed-by=/etc/apt/keyrings/docker.asc] https://download.docker.com/linux/ubuntu \
  $(. /etc/os-release && echo "${UBUNTU_CODENAME:-$VERSION_CODENAME}") stable" | \
  sudo tee /etc/apt/sources.list.d/docker.list > /dev/null
sudo apt-get update
sudo apt-get install docker-ce docker-ce-cli containerd.io docker-buildx-plugin docker-compose-plugin
Add the deployer user to the Docker group (run as root):
usermod -aG docker deployer
Configure Docker security settings (run as root):
cat > /etc/docker/daemon.json << 'EOF'
{
  "icc": false,
  "live-restore": false,
  "userland-proxy": false,
  "log-driver": "json-file",
  "log-opts": {
    "max-size": "10m",
    "max-file": "3"
  },
  "storage-driver": "overlay2",
  "no-new-privileges": true
}
EOF

systemctl restart docker
Initialize Docker Swarm. Switch to the deployer user first:
sudo docker swarm init --advertise-addr <SERVER_IP>
Test SSH
On your local machine, test that SSH works:
# This should work
ssh deployer@SERVER_IP

# This should fail (root login is disabled)
ssh root@SERVER_IP
Set Up GitLab SSH Access
GitLab needs SSH access to the server to make deployments. Generate an SSH key pair:
ssh-keygen -t ed25519 -C "GitLab"
Add the public key to authorized_keys to grant access:
cat ~/.ssh/id_ed25519.pub >> ~/.ssh/authorized_keys
Copy the private key (you'll need it for GitLab):
cat ~/.ssh/id_ed25519
2.5 GitLab Deployment Pipeline
Create a .gitlab-ci.yml file in the swarm folder:
stages:
  - deploy

deploy-production:
  stage: deploy

  when: manual

  before_script:
    # Check for ssh-agent + rsync and install if not present
    - 'which ssh-agent || ( apt-get update -y && apt-get install openssh-client -y  )'
    - 'which rsync || ( apt-get update -y && apt-get install rsync -y )'
    - eval $(ssh-agent -s)
    # Inject the remote's private key
    - echo "$SSH_PRIVATE_KEY" | tr -d '\r' | ssh-add -
    - mkdir -p ~/.ssh
    - chmod 700 ~/.ssh
    # Append keyscan output into known hosts
    - ssh-keyscan $SERVER_IP >> ~/.ssh/known_hosts
    - chmod 644 ~/.ssh/known_hosts
    # Log in the container registry from the server
    - ssh deployer@$SERVER_IP "sudo docker login -u <your_username> -p $ACCESS_TOKEN $CI_REGISTRY"

  script:
    # Save docker-compose.prod.yml on the server
    - rsync -avuz $CI_PROJECT_DIR/docker-compose.prod.yml deployer@$SERVER_IP:~/
    # Deploy the stack
    - ssh deployer@$SERVER_IP "sudo docker stack deploy --with-registry-auth -c docker-compose.prod.yml example-stack"
This pipeline is triggered manually, meaning you will need to start it from the GitLab dashboard (in most cases I prefer that over automatic deployment). First, it sets up an SSH private key on the GitLab runner, then logs in to the container registry from the server. Finally, it uploads docker-compose.prod.yml to the server and deploys the stack. At this point, Docker will pull the images automatically and run them.
Head over to GitLab and create a new repository named Swarm. We will need to create a few variables used in this pipeline.
Set Up GitLab Variables
Add variables for the deployment pipeline. In your Swarm repository:
- Go to Settings → CI/CD
- Expand Variables
- Click Add variable
- Uncheck Protect variable
Add SERVER_IP:
- Key:
SERVER_IP - Value: your server's IP address
Add SSH_PRIVATE_KEY:
- Key:
SSH_PRIVATE_KEY - Value: the output from
cat ~/.ssh/id_ed25519
Add ACCESS_TOKEN:
First, create a personal access token:
- Click your avatar, then your username
- Click Access tokens
- Click Add new token
- Name it
deploy_nextjsand set an expiration date - Select scope:
read_registry - Click Create token and copy it
Then add the variable:
- Key:
ACCESS_TOKEN - Value: your token
In .gitlab-ci.yml, replace <your_username> with your GitLab username.
Push your code. The pipeline is set to manual, so go to GitLab and click the >> icon next to the latest commit to deploy.
2.6 Connect to Postgres from Your Computer
You can connect to your Postgres database from your computer using tools like TablePlus or DBeaver. Our Postgres isn't exposed to the internet (good for security), but we can use an SSH tunnel.
How it works: The database client first connects via SSH to your server. From there, Postgres is available at localhost or 127.0.0.1. That's why we exposed port 5432:5432 in docker-compose.prod.yml - it's accessible on the server, but the firewall blocks external access.
To set this up, find the SSH section in your database client. Use "Public Key" authentication and select the same private key you use for SSH: /Users/<user>/.ssh/<privkey>
See guides for TablePlus↗ and DBeaver↗.
BONUS: Logging with Loki
Right now, to see logs you need to SSH into your server and run commands like sudo docker service logs example-stack_app -f. That's tedious. A better way is to use Loki on Grafana Cloud (it's free). It collects your logs using a Docker plugin.
Install the Loki plugin:
docker plugin install grafana/loki-docker-driver:latest --alias loki --grant-all-permissions
Check it installed: docker plugin ls
Create a free Grafana Cloud account and get your Loki URL. You'll find it in your Grafana dashboard under Loki.
Add logging to docker-compose.prod.yml:
...
services:
  proxy:
    ...
    logging:
      driver: loki
      options:
        loki-url: 'https://<user_id>:<password>@logs-prod-us-central1.grafana.net/loki/api/v1/push'
        max-size: '256m'
        max-file: '1'
...
Note that I added max-size and max-file to prevent the local log copy growing indefinitely, potentially causing your VPS to run out of disk space.
See the Loki Docker driver docs↗ for more info.