In the previous post we took a local MCP server from stdio to live in Claude.ai through a public URL (tunnel). Anyone with that URL could call its tools. That is fine for a weather demo, not for anything that touches real data. The next step is authentication: each user logs in, and the server only runs tools for tokens it trusts.
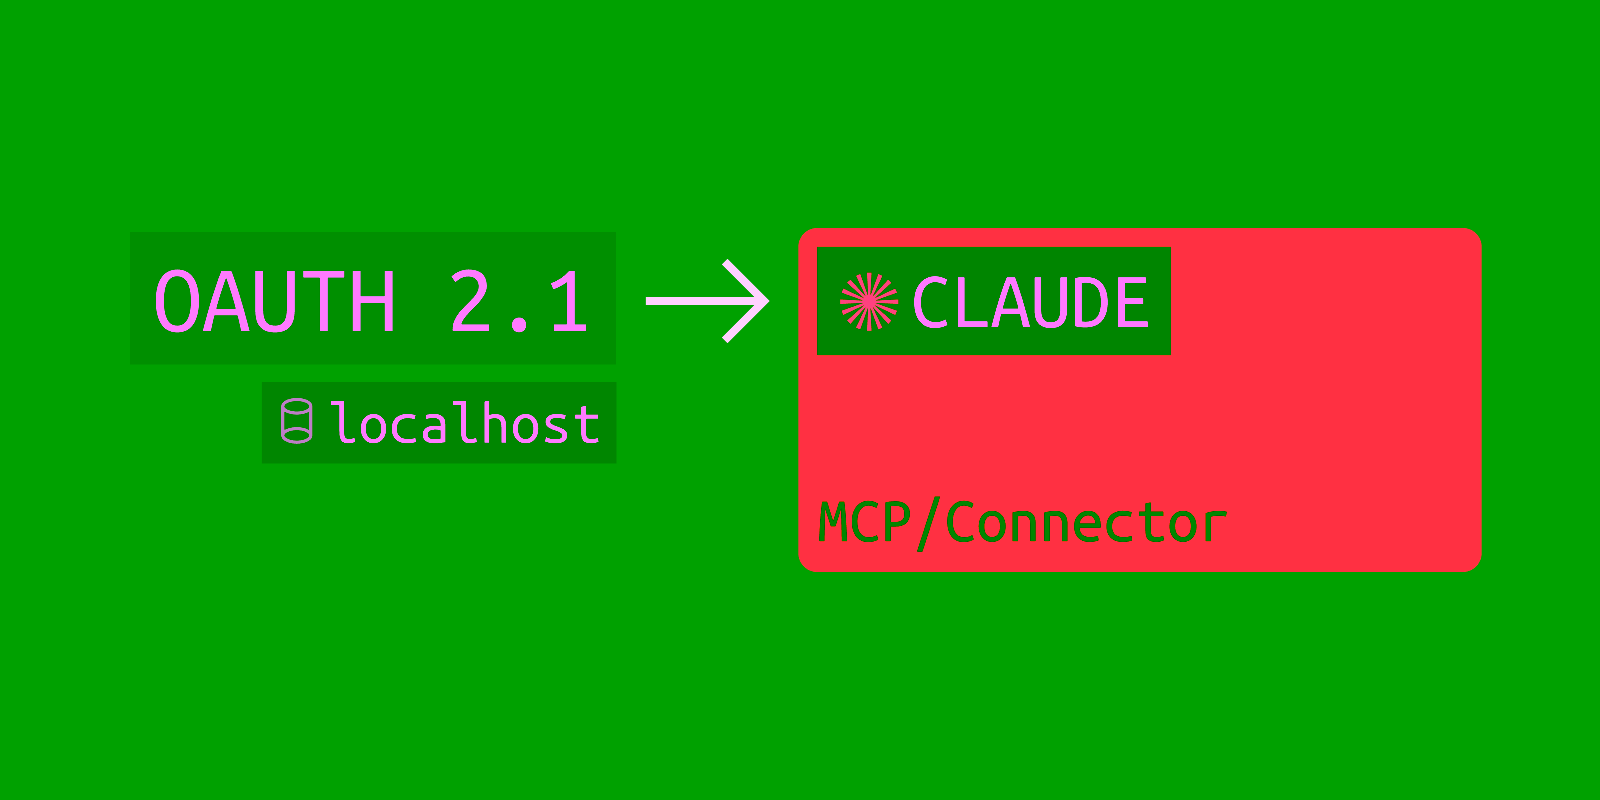
MCP standardized on OAuth 2.1 for this. The part nobody warns you about is that OAuth binds the entire flow to your server's URL. Discovery, client registration, and the redirect back all hang off one hostname, and that hostname cannot change between the moment a client registers and every later run. This is the exact point where a free tunnel with a rotating subdomain stops working, and where a stable URL becomes a hard requirement. We build on the same weather server from the previous post, so if you have not read it, start there.
This is a working walkthrough. The handshake output below is real, from the server we are about to build.
OAuth ties everything to your server's URL
When a client connects to a protected MCP server, it does not magically know how to log in. It learns by reading a document served from your server's own hostname, then gets redirected back to a callback tied to that hostname. Three things are nailed to the host:
- The discovery document at
/.well-known/oauth-protected-resource. - The token's audience. It is issued for your server's URL and your server rejects tokens issued for anything else.
- The redirect that returns the user to the client after consent.
Move the host and all three break. Keep this in mind through the whole post. A stable URL is not a nicety here, it is load-bearing.
What happens when Claude connects
Here is the full round trip. When Claude first calls your server with no token, it gets a 401 that points at your discovery document:
HTTP/1.1 401 Unauthorized
WWW-Authenticate: Bearer realm="OAuth", resource_metadata="https://amber-star-70.localcan.dev/.well-known/oauth-protected-resource"
Claude fetches that document and learns which authorization server to use:
{
  "authorization_servers": ["https://your-env.scalekit.dev/resources/res_..."],
  "bearer_methods_supported": ["header"],
  "resource": "https://amber-star-70.localcan.dev",
  "scopes_supported": ["weather:read"]
}
From there the sequence runs on its own:
- Claude reads the authorization server's own metadata.
- It registers itself, either through Dynamic Client Registration (DCR) or a Client ID Metadata Document (CIMD).
- It runs the PKCE authorization flow.
- The user signs in and consents.
- Claude receives an access token.
- Claude retries the original call with
Authorization: Bearer <token>. - Your server validates the token and runs the tool.
Notice the shape. The two ends of that flow, the 401 trigger and the token validation, are yours. Everything in the middle (login, consent, token issuance, client registration) is the authorization server's job. Which raises the obvious question.
Wait, I already have Google sign-in. Why a separate provider?
Because the role you play is reversed from a normal app. In a SaaS app you are the OAuth client and Google is the authorization server:
Your app --> (log this user in) --> Google = authorization server
With MCP, the client is Claude, and it authenticates to your server. Now your side has to be, or sit behind, the authorization server:
Claude = client --> (give me a token for YOUR server) --> ??? = authorization server you provide
Google cannot fill that role directly, for two reasons. Hosted clients like Claude register themselves on the fly with DCR or CIMD, and Google does not let arbitrary external clients self-register against your project. And the token has to be issued for your server's audience. The MCP spec forbids accepting a token that was not issued for you, so you cannot reuse a Google access token at your endpoint.
You do not lose Google sign-in, though. It moves upstream of the authorization server. The provider speaks the MCP OAuth dialect to Claude and delegates the actual human login to Google, GitHub, or enterprise SSO behind the scenes:
Claude --> authorization server (DCR, PKCE, tokens scoped to your server)
               └── "Sign in with Google"   (the human logs in here)
That authorization-server-in-the-middle is what Scalekit is. It is purpose-built for MCP, so it handles DCR, CIMD, PKCE, and JWKS for you, and you keep ownership of the small resource-server piece: validating the token and serving the discovery document. If you would rather self-host, Cloudflare's open-source workers-oauth-provider or Keycloak fill the same slot. Rolling your own is the one option to avoid. It is the security-critical part, and it is where most MCP servers get it wrong.
Set up Scalekit
In the Scalekit dashboard:
- Go to MCP servers and click Add MCP server, then give it a name.
- Enable DCR so hosted clients can register themselves.
- Enable Client ID Metadata Document (CIMD).
- Under advanced settings, set the Server URL to your public URL and define the scopes, here
weather:read. An access token lifetime of 300 to 3600 seconds is a reasonable default. - Save, then copy the entire Metadata JSON from the dashboard (the minified, single-line version). You serve it from your server verbatim.
Then collect the credentials into a .env file. The first three come from your Scalekit environment. MCP_RESOURCE_ID is your public URL (the token audience), and PROTECTED_RESOURCE_METADATA is the minified Metadata JSON you just copied:
SCALEKIT_ENVIRONMENT_URL=https://your-env.scalekit.dev
SCALEKIT_CLIENT_ID=skc_...
SCALEKIT_CLIENT_SECRET=...
MCP_RESOURCE_ID=https://amber-star-70.localcan.dev
PROTECTED_RESOURCE_METADATA='{"authorization_servers":["https://your-env.scalekit.dev/resources/res_..."],"bearer_methods_supported":["header"],"resource":"https://amber-star-70.localcan.dev","scopes_supported":["weather:read"]}'
MCP_RESOURCE_ID, the resource field inside the metadata JSON, and the Server URL you set in Scalekit must all be the same string as your public URL. It is the token audience, and a mismatch is the most common reason validation fails later.
Add auth to the server
Install the SDK:
npm install @scalekit-sdk/node
We make two additions to the Hono server from the previous post: the discovery endpoint, and a bearer check in front of /mcp. The weather tool itself does not change.
 import { StreamableHTTPServerTransport } from '@modelcontextprotocol/sdk/server/streamableHttp.js'
+import { Scalekit, type TokenValidationOptions } from '@scalekit-sdk/node'
 import { Hono } from 'hono'
 import { getServer } from './server.js'

+// Scalekit is the authorization server. We are the resource server: we only
+// validate the token and serve the discovery document that points at Scalekit.
+const scalekit = new Scalekit(
+ process.env.SCALEKIT_ENVIRONMENT_URL,
+ process.env.SCALEKIT_CLIENT_ID,
+ process.env.SCALEKIT_CLIENT_SECRET,
+)
+
+const RESOURCE_ID = process.env.MCP_RESOURCE_ID
+const METADATA_URL = `${RESOURCE_ID}/.well-known/oauth-protected-resource`
+const WWW_AUTHENTICATE = `Bearer realm="OAuth", resource_metadata="${METADATA_URL}"`
+
 const app = new Hono()

+// Discovery: serve the Protected Resource Metadata JSON copied from the
+// Scalekit dashboard, verbatim. Public, no auth.
+app.get('/.well-known/oauth-protected-resource', (c) =>
+ c.json(JSON.parse(process.env.PROTECTED_RESOURCE_METADATA)),
+)
+
+// Gate /mcp on a valid bearer token. No token or a bad one returns 401 with the
+// WWW-Authenticate header that points the client at the discovery document.
+app.use('/mcp', async (c, next) => {
+ const authHeader = c.req.header('authorization')
+ const token = authHeader?.startsWith('Bearer ') ? authHeader.slice(7).trim() : null
+ if (!token) {
+   return c.body(null, 401, { 'WWW-Authenticate': WWW_AUTHENTICATE })
+ }
+ // Validate the audience always. Require the tool scope only on tool calls.
+ const options: TokenValidationOptions = { audience: [RESOURCE_ID] }
+ if ((await c.req.json())?.method === 'tools/call') {
+   options.requiredScopes = ['weather:read']
+ }
+ try {
+   await scalekit.validateToken(token, options)
+ } catch {
+   return c.body(null, 401, { 'WWW-Authenticate': WWW_AUTHENTICATE })
+ }
+ await next()
+})

 app.post('/mcp', async (c) => {
   // ...unchanged from the previous post
 })
That is the whole resource-server side. validateToken verifies the signature against Scalekit's JWKS, checks the audience is your server, and enforces the scope. You never see a password, a consent screen, or a refresh token.
Verify the discovery handshake locally before involving Claude. The metadata endpoint should return your JSON:
curl -s http://127.0.0.1:8765/.well-known/oauth-protected-resource
{"authorization_servers":["https://your-env.scalekit.dev/resources/res_..."],"bearer_methods_supported":["header"],"resource":"https://amber-star-70.localcan.dev","scopes_supported":["weather:read"]}
And a call with no token should be refused with the pointer to that document:
curl -s -i -X POST http://127.0.0.1:8765/mcp \
  -H 'Content-Type: application/json' \
  -H 'Accept: application/json, text/event-stream' \
  -d '{"jsonrpc":"2.0","id":1,"method":"initialize","params":{}}'
HTTP/1.1 401 Unauthorized
WWW-Authenticate: Bearer realm="OAuth", resource_metadata="https://amber-star-70.localcan.dev/.well-known/oauth-protected-resource"
That 401 is the trigger. Without it, Claude never starts the OAuth flow.
One note for browser clients. Claude.ai reaches your server cloud to cloud, so it needs no CORS, which is why the checks above pass without any. Browser-based clients like ChatGPT or the in-browser Inspector do need it, so when you target those, add CORS that allows the Authorization header and exposes WWW-Authenticate.
Point your stable URL at it
Bring up the public URL exactly as before:
localcan http 8765
Now the URL carries more weight than it did in the first post. Three things hang off this exact host: the discovery document, the token audience, and Claude's redirect after consent. Claude uses two callback domains, and both need to be reachable: https://claude.ai/api/mcp/auth_callback and https://claude.com/api/mcp/auth_callback.
This is where a stable hostname stops being optional. A *.localcan.dev URL does not expire while the tunnel is connected, and only expires after seven days if you pause it, so an active development session never loses its host. A custom domain never expires at all, which means you register the callback once and never touch it again. A custom verified domain is also the answer to identity providers, Google in particular, that refuse to authorize an unverified tunnel domain.
Contrast that with a free tunnel that hands you a new random subdomain on every restart. Each restart changes your discovery URL, your audience, and your callback, so you re-register on every run. That is the friction this whole post exists to remove.
One thing to double check: the Server URL in Scalekit, MCP_RESOURCE_ID in your env, and the public URL must all be the same string. The audience check compares them exactly.
Connect it in Claude and complete consent
Add the connector the same way as the first post: Settings, Connectors, Add custom connector, and paste the public URL with the /mcp path. This time Claude hits the 401, reads your discovery document, registers with Scalekit, and sends you through the login.
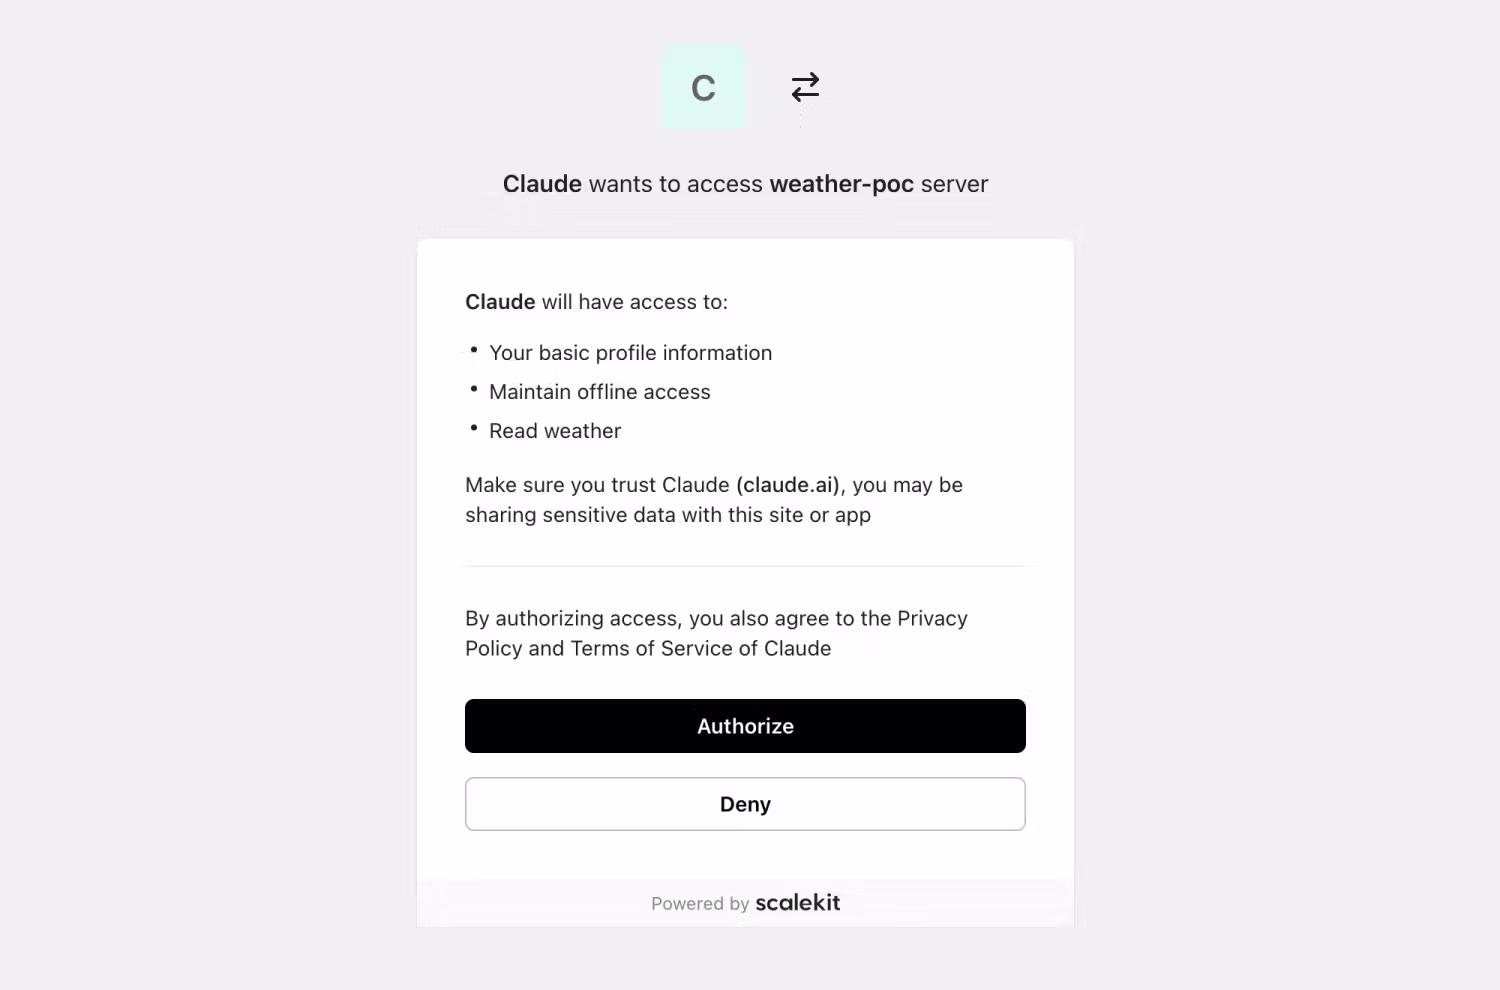
You will see a consent screen, sign in through whatever upstream method you configured, and land back in Claude. From that point the tool calls carry a bearer token, your server validates it, and get_weather runs as an authenticated user.
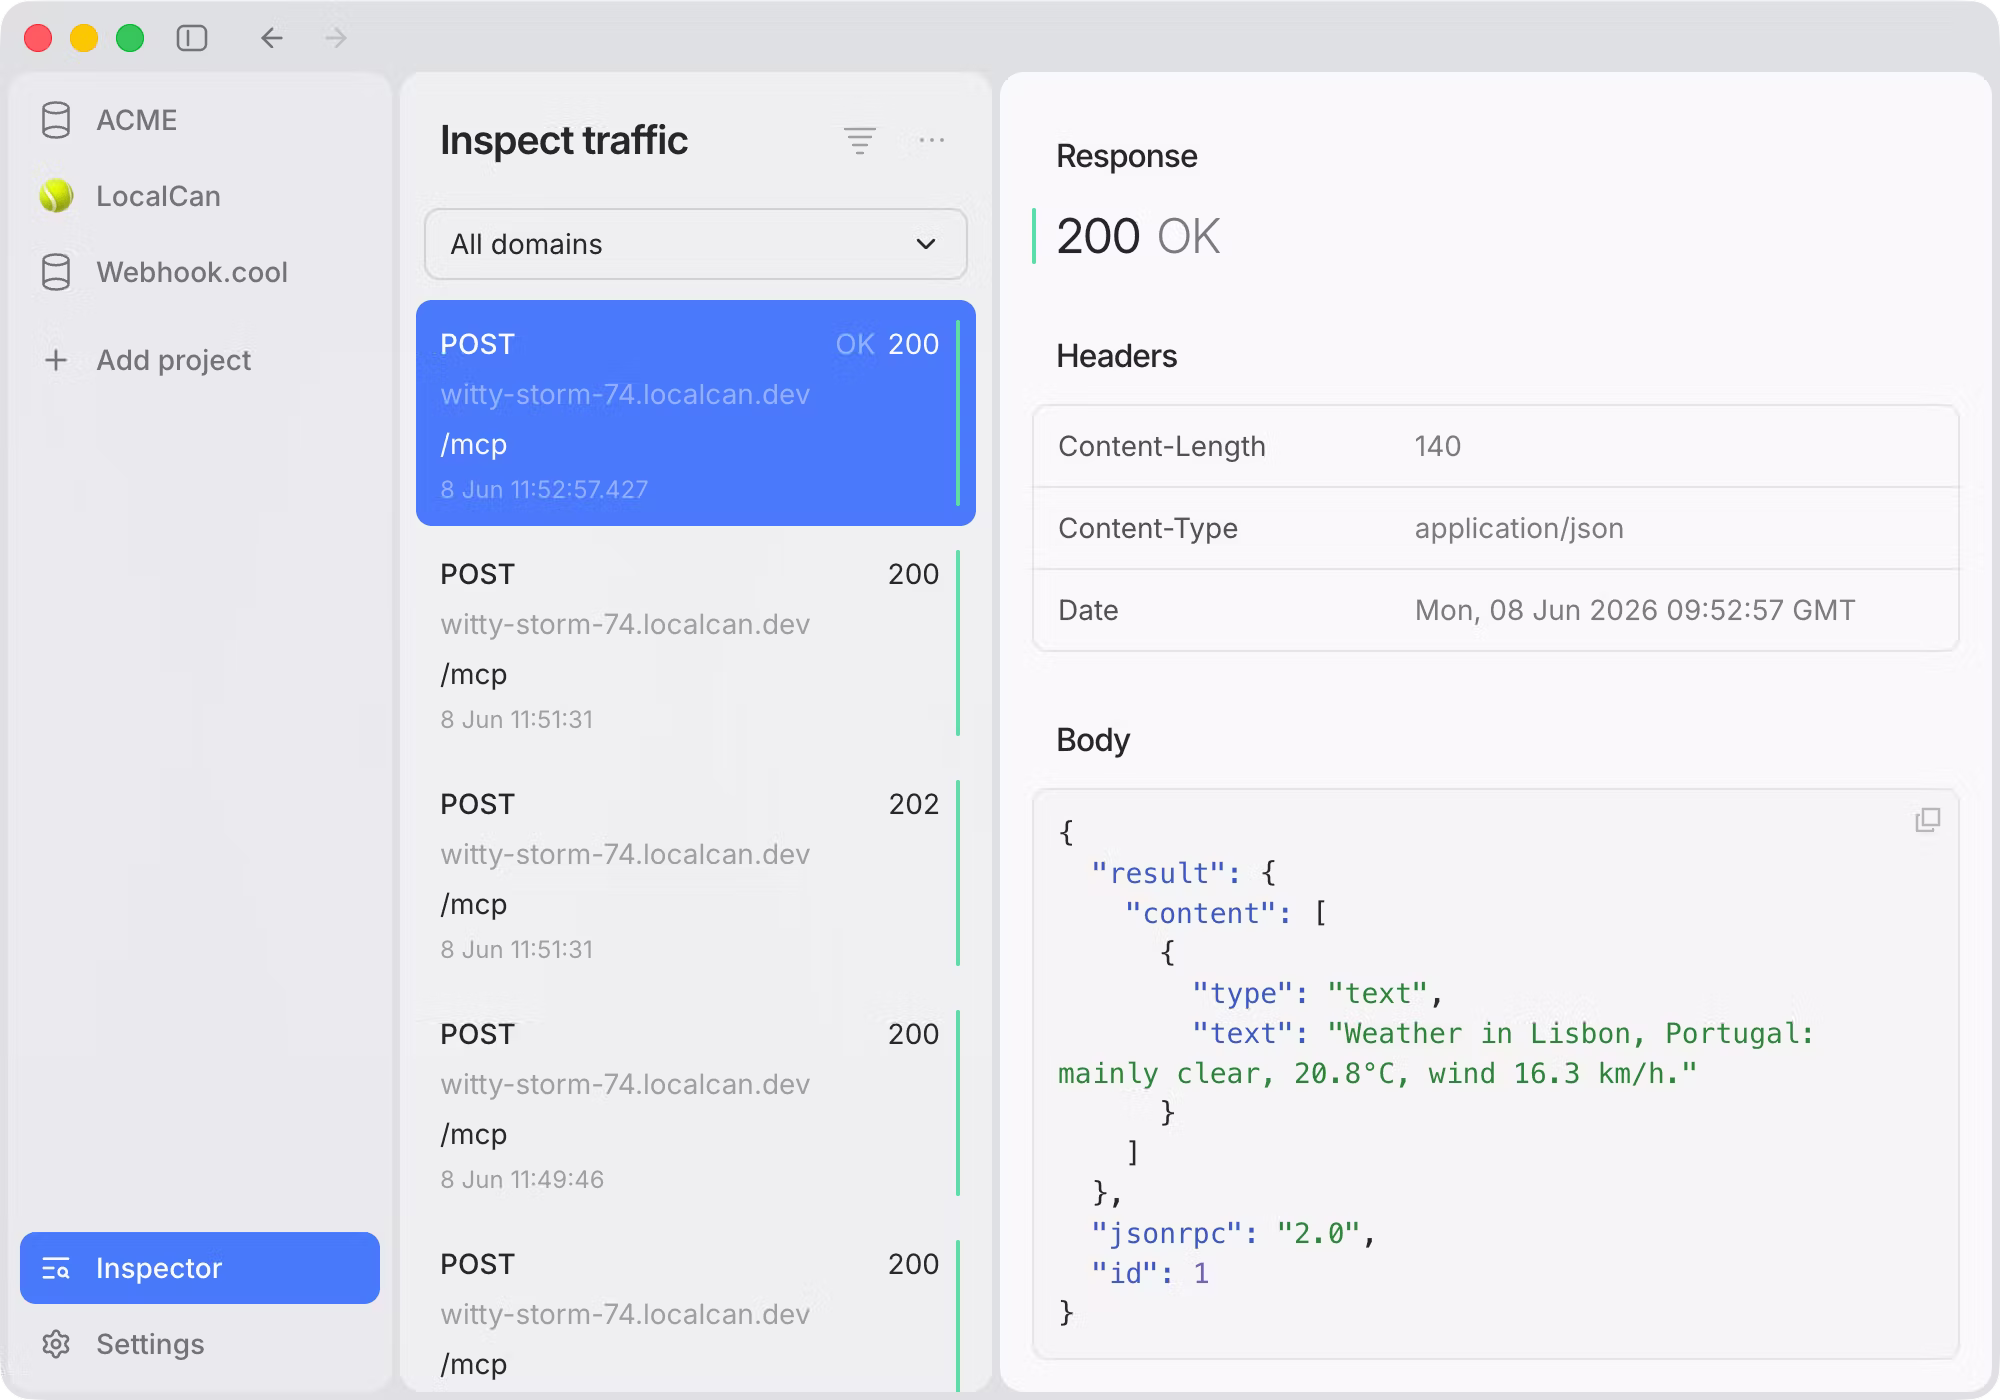
Because the MCP traffic runs through LocalCan, its request inspector shows the actual JSON-RPC response from your server, alongside the 401 that starts the OAuth flow and the token-bearing retry that follows. That visibility is what makes a stuck handshake easy to debug.
Gotchas worth naming
The auth-specific failures, each with the one-line fix:
- Audience mismatch. The Server URL in Scalekit,
MCP_RESOURCE_ID, and the public URL must be identical. If validation fails on a token that looks fine, this is almost always why. - Disabling DCR and managing callbacks by hand. With DCR on (the setup above), Scalekit registers Claude's two callback URLs (
claude.aiandclaude.com) for you. If you turn it off and pre-register the client yourself, you must add both, and missing one stalls the flow. localhostversus127.0.0.1in a redirect URI. The spec treats them as different strings, so registration and the live request must use the same one.- An identity provider refusing an unverified tunnel domain. Point a verified custom domain at the server.
- Discovery served over HTTP or on the wrong host. The
/.well-known/oauth-protected-resourcedocument must be HTTPS and on the same hostname Claude is talking to. - Reusing a token from somewhere else. Do not accept tokens not issued for your server. The
audienceoption onvalidateTokenenforces this for you. - A trailing dot or space in the connector URL. It can slip past the initial discovery probe but then 404s every authenticated call, because
/mcp.is not/mcp. Type the URL rather than paste it.
When to move to production
The tunnel plus Scalekit is the development loop. For production the same Scalekit environment scales, and you deploy the resource server to Cloudflare, Vercel, or Railway. The one thing that should not change is the host. A custom domain keeps your development and production callback URLs identical, so the OAuth configuration you set up here carries straight through.
Wrap
You now have an MCP server users log into, Claude completes the full OAuth flow against it, and because the URL is stable you configured the callback once. Two posts in, the path is complete: from a local stdio server, to a public HTTPS server, to an authenticated one.
The next post points the same server at a different client. ChatGPT's Developer Mode has its own rules, starting with no localhost support at all.